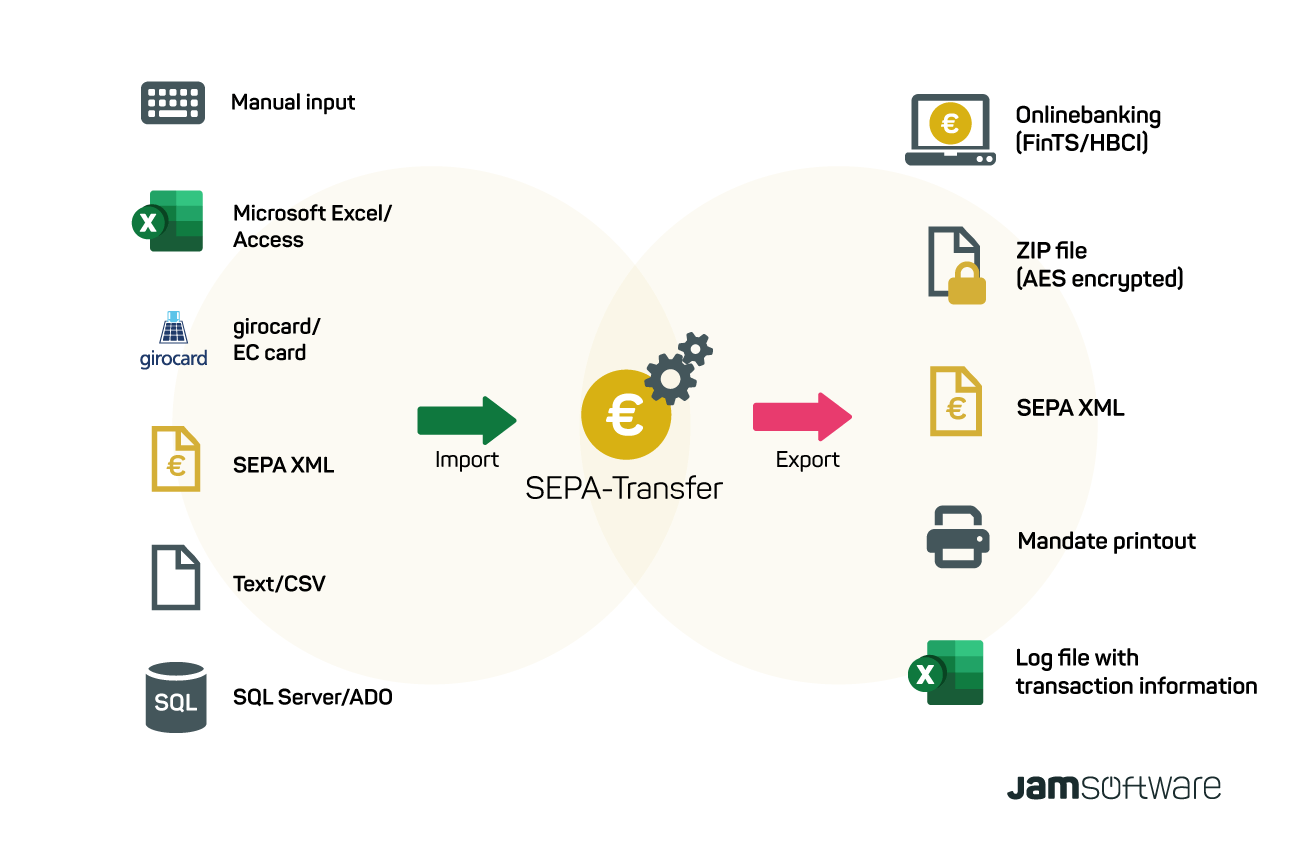

SEPA-Transfer Visual Tour
Show transcription
[On Screen: Intro: the SEPA-Transfer logo with the tagline “Transfer payment data: Excel to SEPA XML converter”.]
With SEPA-Transfer, you can easily convert payment data available in an Excel file into the SEPA XML format.
[On Screen: An Excel sheet named “Payment Data” with the columns Recipient, First name, Amount, IBAN, and Purpose.]
To do this, first prepare your payment data by naming the columns appropriately to make the import into SEPA-Transfer easier.
[On Screen: SEPA-Transfer Enterprise Edition with the Import/Export ribbon; the SEPA-Transfer Import Wizard opens with steps for file type, file path, transaction type, number of transactions, columns, error handling and start import.]
Next, open SEPA-Transfer. Select Import/Export. Click on Import File and select the desired Excel file. Select the booking type and the SEPA-Transfer account to be used. In the preview, you already get a first look at the payment data you are about to import into the program.
[On Screen: In the “Select columns” step, the Excel columns are mapped to SEPA fields such as Recipient, IBAN, BIC, Purpose, Amount, End-to-end ID, Execution date and SEPA Purpose Code, with a live data preview.]
Once you have named the columns appropriately, SEPA-Transfer takes care of the column assignment. Additional fields or errors can be easily adjusted via drop-down. Finally, click on “Execute Import” and all your payment data is stored in SEPA-Transfer.
[On Screen: The message “Import completed successfully” offers the options Send transactions, Export to SEPA XML file, and Edit transactions; the current bookings are shown in a list with an edit form (recipient, IBAN, BIC, amount, purpose, execution date).]
Check the individual entries in the current bookings for correctness. Then you can start exporting the payment data into the SEPA XML format.
[On Screen: The “Export to SEPA XML” dialog lists the transactions and offers options such as transaction type (bank transfer or direct debit), the output path and consolidation settings; a folder picker selects the output directory.]
Select Import/Export again and here “Create SEPA XML file”. Here you can select the open bookings you want to convert to SEPA, either all together or individually. Select the desired output directory and click OK. The conversion is already completed. You can now continue working with your payment data in SEPA XML format.
[On Screen: A “File export” dialog confirms that the transactions were exported successfully and offers to open the file, open the folder, or return to SEPA-Transfer; a wizard step handles invalid transactions.]
One more tip: right after the import, you can also export your payment data to the SEPA XML format with just one click. That way you save even more time with SEPA-Transfer.
[On Screen: Closing screen: “SEPA-Transfer — SEPA Payments With Just One Click”, with a “30 Days Free Trial” button.]
Main Program
Bank Transfer Form
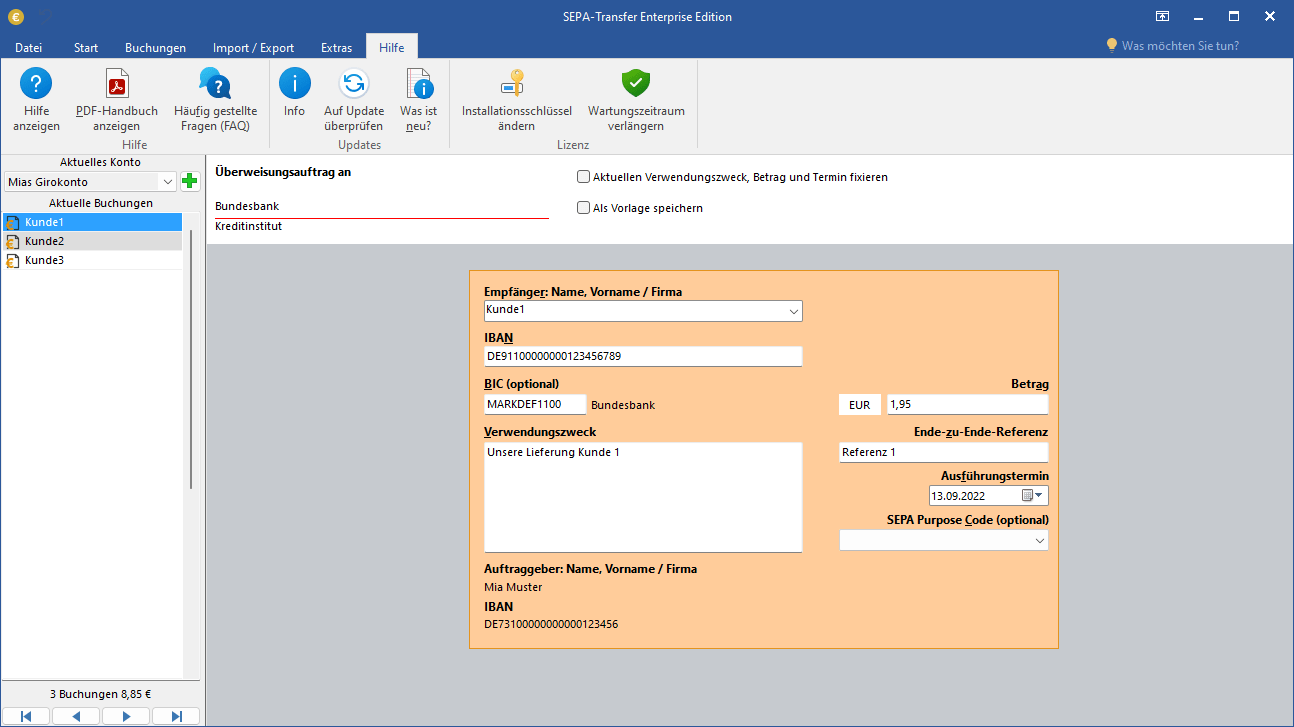
You can fill out the transfer form manually - just like with a paper template. Alternatively, you can import the data from various sources (e.g. CSV, Excel or text files). With the Enterprise Edition, you can import data from any ADO source (such as MS Access or MS SQL). If desired, a booking once entered can be saved as a template.
Account Settings
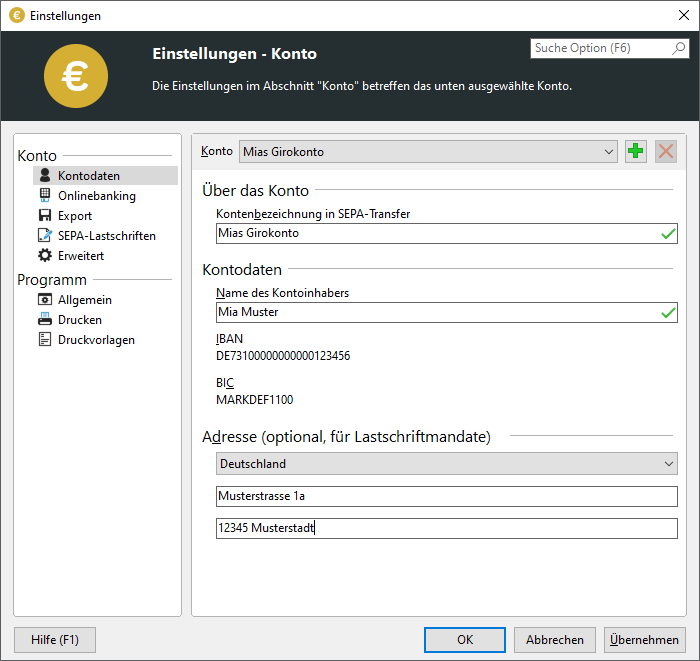
In the settings, you create the accounts to be managed and enter all relevant data. Here you define how online communication with the bank can be verified.
Import Wizard
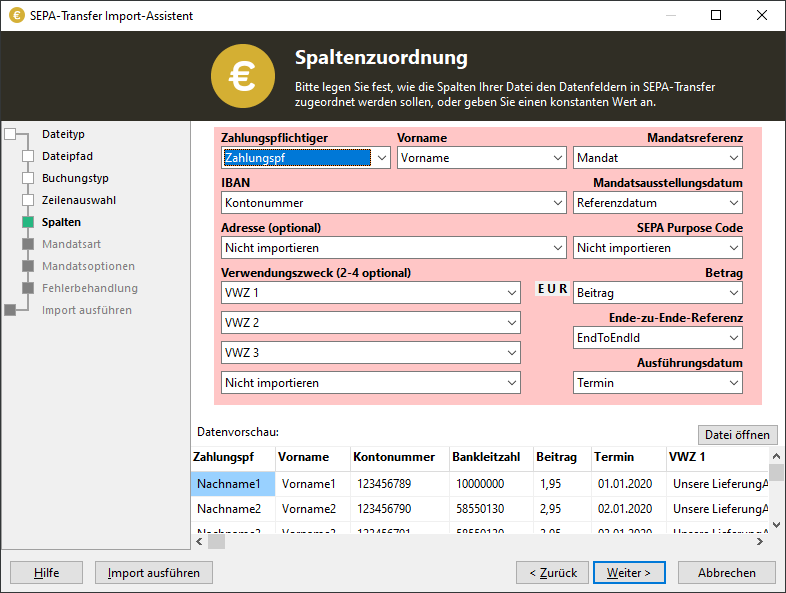
The Import Wizard supports you in importing transaction data from different sources such as SEPA, text, CSV, Excel files, or from a database.
Import Export
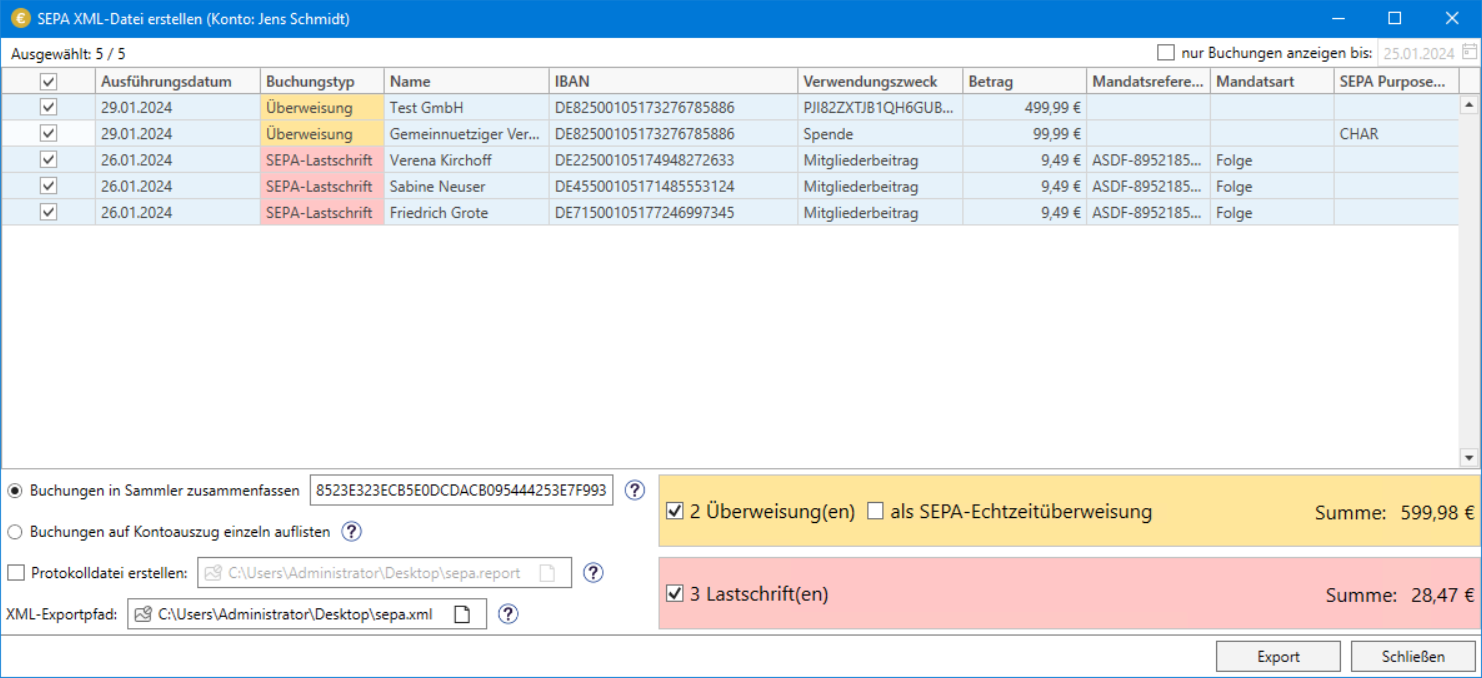
All data is clearly presented again before export. You can thus see at a glance whether the transactions to be executed are correct.
Debit Settings
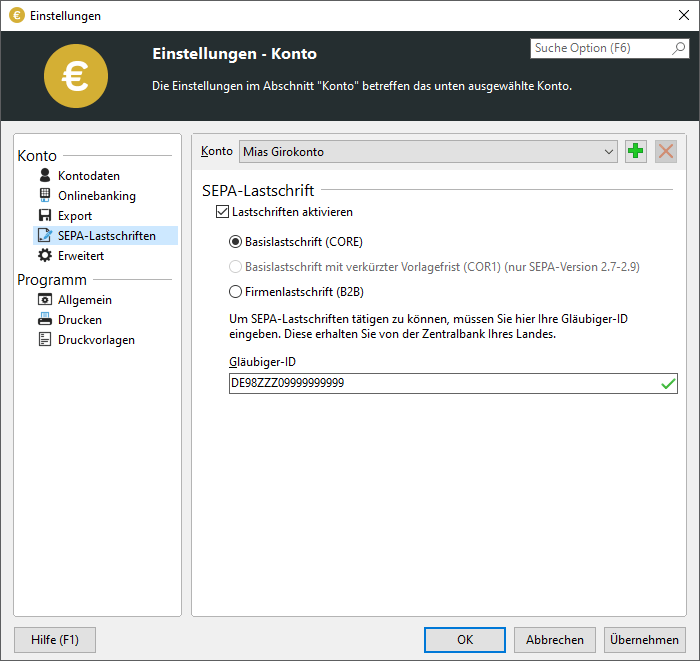
In the Direct Debit settings, select the type of direct debit and specify the printer type on which direct debits and SEPA mandates are to be printed. In the SEPA Transfer Enterprise Edition, you adapt templates in the integrated editor.
Turnover Query
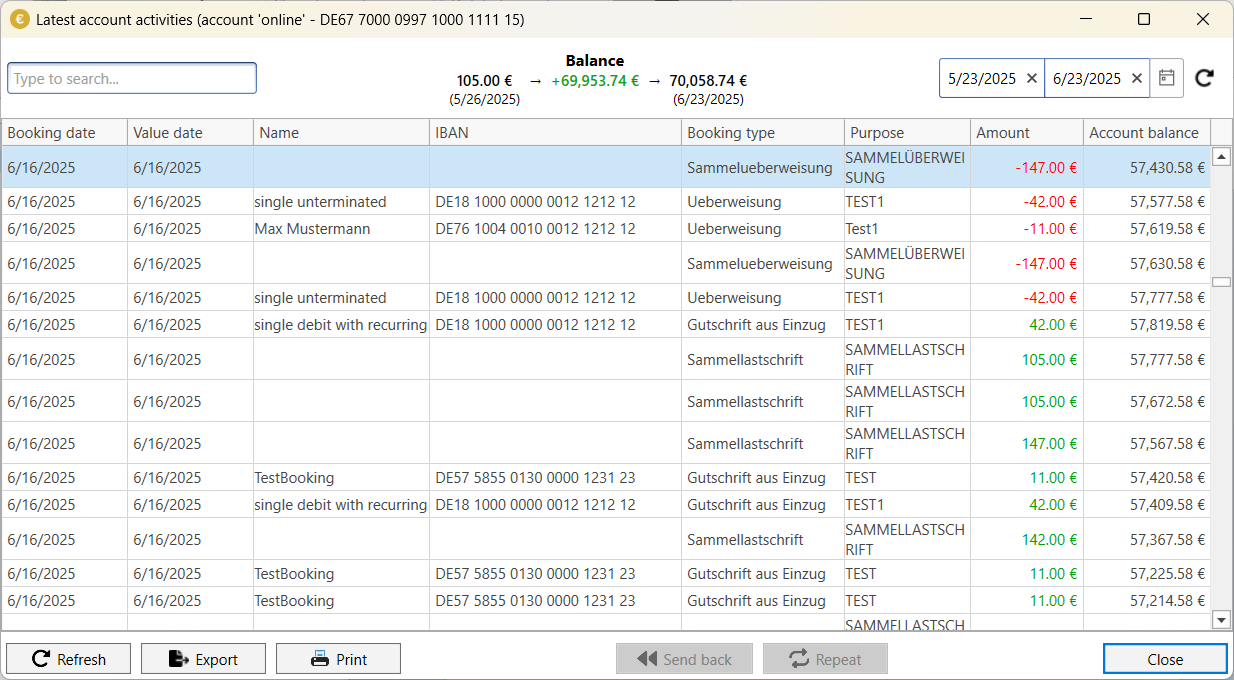
SEPA-Transfer can retrieve your current account transactions from your bank. The displayed transactions can be filtered by payment debtor, purpose and other values and exported as Excel or PDF files.
Chart SEPA-Transfer Functionality